You will need:
|
Fleece Fabric |
Fleece Fabric is usually 58'' - 60'' wide
1 yd makes two 30 x 36 blankets (Square fabric then cut in half lengthwise) 1 1/4 yd or 1 1/2 yd makes one older child blanket Note: We do not recommend using Ultra Cuddle or micro fleece fabric. |
|
Yardstick and rotary cutter (or scissors) |
Rotary cutter works best to neatly cut fleece fringe. If using scissors, make cuts straight and even, with no frayed edges. You'll need sharp scissors!
|
This blanket is made in five easy steps:
Step #1: (Very Important)
Remove selvage edges from fabric and square the fabric up evenly. To square fabric, use a cutting mat, grout lines on a tile floor or any straight line surface. Fold fabric in half and trim edges until you have a perfect rectangle.
Step #2: |
|
Step #3: |
|
Cut a 2 - 2 1/2 inch square from each corner of the fleece. A 2 inch cut works on smaller blankets; 2 1/2 inch cut on larger blanket.
Selvages removed and fabric squared -> |
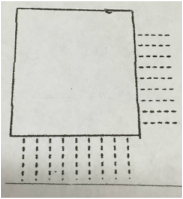
|
Depending on the size of the square cut in the corner, cut a 2'' or 2 1/2'' long x 1'' wide fringe of strips around the fabric.
<--- 1'' wide strips cut on all sides of fabrics <--- Square cut out of each corner. A cardboard or fabric template is a good idea. |
Step #4:
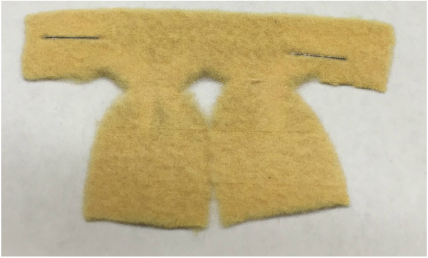
Using a Fiskar 1/16th inch scrapbooking hole punch (we have found this works well but you can use cuticle scissors, etc.) make a tiny hole in the top center of each strip.
Step #5:
|
Feed the strip up through the back side of the hole you made and pull it to the front to create a neat and secure fringed edge.
Front of the fabric should have all tabs like these on all sides of the blanket. ---> Important: Make sure all tabs are pulled thru the holes going the in the same direction. |
|
